
Unlocking the Secrets of Professional Furniture Finishing
The allure of flawlessly finished furniture is undeniable. A professional-grade spray paint job elevates any project, whether it’s breathing new life into a vintage find or adding a personalized touch to a contemporary piece. That showroom-worthy sheen, however, isn’t achieved with a simple can of paint and a quick spray. It demands a deep understanding of advanced techniques, a nuanced approach to material selection, and a commitment to meticulous preparation. This comprehensive guide delves into the intricacies of spray painting furniture, equipping both seasoned DIY enthusiasts and aspiring furniture refinishers with the knowledge and skills to transform ordinary pieces into extraordinary works of art.
Think of it as unlocking the potential hidden within every piece, revealing its true beauty through the transformative power of spray paint. The world of spray painting offers a spectrum of possibilities, from achieving a classic, smooth lacquer finish to exploring textured or distressed effects. Imagine revitalizing a worn-out dresser with a vibrant coat of teal, or giving a mid-century modern chair a sleek, matte black update. The ability to customize color and finish empowers you to create pieces that perfectly complement your personal style and interior design.
With the right techniques, you can achieve results comparable to professionally refinished pieces, saving significant costs and adding a unique, personal touch to your home. Beyond aesthetics, spray painting offers practical advantages. It’s often the most efficient method for covering large surface areas or intricate details, delivering a consistent and even finish that can be difficult to achieve with traditional brushing or rolling. For instance, imagine painting the ornate carvings of a vintage headboard – a task that would be painstaking with a brush, but becomes manageable and efficient with a spray gun.
Moreover, spray painting allows for a wider range of finishes, from high-gloss to matte, opening up a world of creative possibilities. Whether you’re working with wood, metal, or plastic, understanding the nuances of spray painting can elevate your DIY projects to a professional level. This guide will take you through every step of the process, from selecting the appropriate spray gun and nozzle (HVLP or airless sprayer, depending on your project and material) to mastering the art of surface preparation.
We’ll cover the critical steps of sanding, priming, and filling imperfections, ensuring a flawless base for your chosen finish. You’ll learn how to fine-tune your spray gun settings, controlling pressure, fan pattern, and flow rate to achieve optimal atomization and minimize overspray, a common issue for beginners. We’ll also explore advanced techniques like blending and shading, which allow you to create depth, dimension, and custom faux finishes, such as antiquing and distressing. Finally, we’ll address common troubleshooting issues like runs, orange peel, and fisheyes, offering solutions and preventive measures. By the end of this guide, you’ll not only possess the technical skills but also the confidence to tackle any furniture refinishing project with the finesse of a professional.
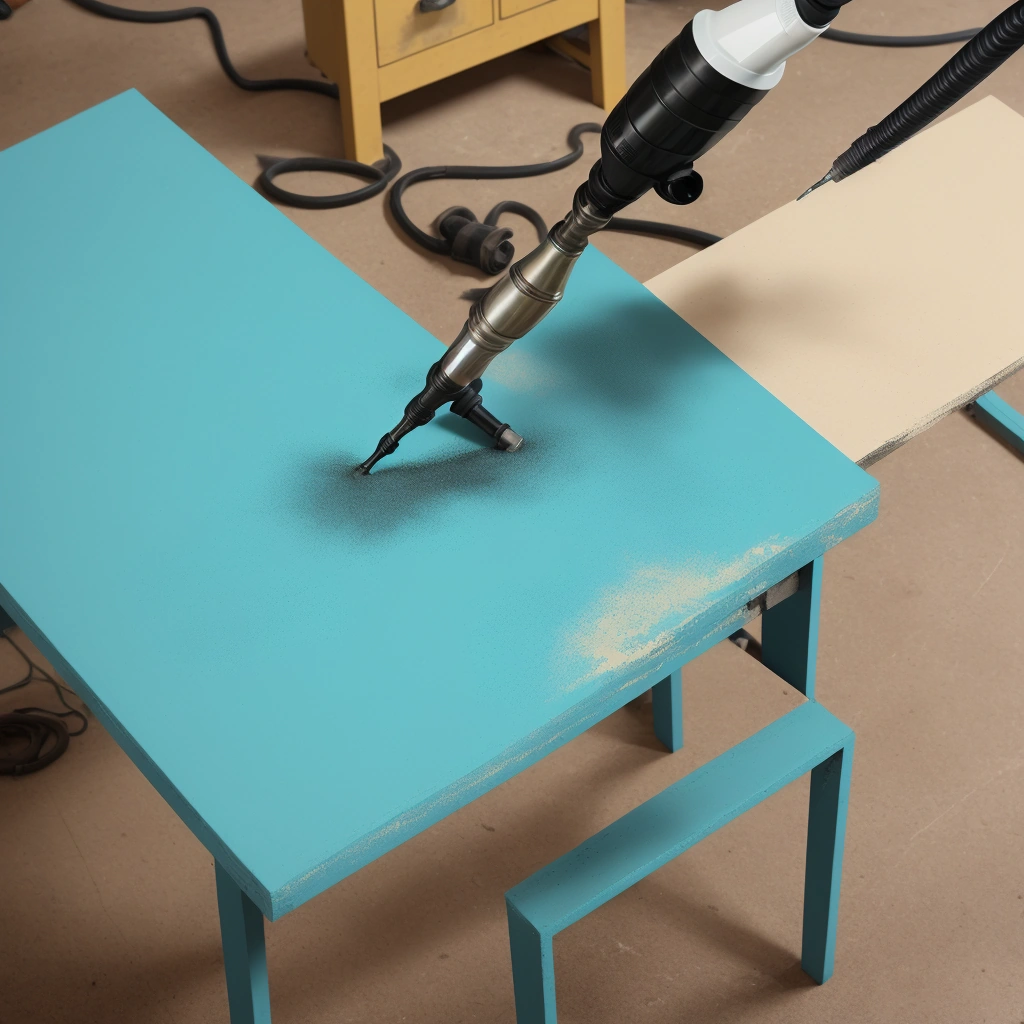
Choosing Your Weapon: Spray Gun and Nozzle Selection
The foundation of any exceptional spray paint job lies in selecting the right tools, and the spray gun, often overlooked, is as crucial as the paint itself. Different materials demand different approaches, making the choice of spray gun technology paramount to achieving a professional finish. For wood furniture refinishing, a high-volume, low-pressure (HVLP) spray gun reigns supreme. Its gentle application minimizes overspray, crucial when working with intricate details or delicate veneers, while delivering a smooth, even coat that beautifully showcases the wood grain.
This makes HVLP systems ideal for revitalizing antique chairs, dressers, or tables, providing a factory-like finish in a DIY setting. When tackling metal projects, such as wrought iron furniture or automotive parts, an airless sprayer becomes the tool of choice. Airless sprayers excel at atomizing thicker coatings like primers and high-gloss enamels, providing superior coverage and durability. The higher pressure ensures excellent adhesion and a uniform finish, even on complex metal surfaces. For plastic surfaces, which are prone to warping or damage from excessive pressure, a detail spray gun coupled with careful pressure regulation is essential.
This combination allows for controlled application, preventing damage while achieving a smooth, professional-grade finish. Consider using a smaller nozzle (around 1.0mm) for detail work and a slightly larger nozzle (1.3-1.5mm) for broader surfaces. Nozzle selection is equally important for any material. Smaller nozzles (0.5-1.0 mm) are ideal for fine finishes and intricate details, allowing for precise application and minimizing paint waste. Think of restoring vintage hardware or adding delicate pinstriping. Larger nozzles (1.5-2.5 mm) are better suited for covering large, flat surfaces quickly, perfect for refreshing cabinets, fences, or walls.
Experimentation with different nozzle sizes and observing the spray pattern on test pieces is crucial for achieving the desired finish. Understanding the nuances of your chosen spray gun and its settings is akin to mastering a musical instrument; each adjustment impacts the final outcome. Always refer to the manufacturer’s recommendations for your specific spray gun and the type of paint being used. Their expertise will guide you toward the optimal settings and ensure both project success and your safety. Proper surface preparation, including sanding, priming, and filling imperfections, is essential regardless of the spray gun or nozzle used. This meticulous groundwork ensures optimal paint adhesion and a flawless finish that will stand the test of time.
The Art of Preparation: Sanding, Priming, and Filling
The transformative power of spray painting hinges on a meticulous preparation process. Before a single drop of paint touches the surface, dedicate ample time to preparing the furniture. This crucial step ensures a professional, flawless finish that stands the test of time. Sanding is the cornerstone of this preparation, smoothing imperfections and creating an ideal surface for paint adhesion. Begin with a coarser grit sandpaper, such as 80 or 100 grit, to effectively remove existing finishes, deep scratches, or other prominent blemishes.
As the surface becomes more uniform, gradually transition to finer grits, like 150 and then 220, to achieve a polished, smooth texture. For intricate details or hard-to-reach areas, consider using sanding sponges or a detail sander. This progressive sanding process not only refines the surface but also ensures optimal paint bonding, minimizing the risk of peeling or chipping later on. Priming is the next critical step, acting as a bridge between the prepared surface and the paint.
A quality primer seals the surface, preventing the wood from absorbing the paint unevenly, which can lead to a blotchy finish. It also provides a uniform base for the paint, enhancing color vibrancy and ensuring a consistent sheen. When selecting a primer, consider the material of your furniture. Oil-based primers are excellent for stain blocking and offer superior adhesion, while water-based primers dry faster and have lower VOCs, making them more environmentally friendly. For furniture refinishing projects, a shellac-based primer is often preferred for its ability to seal knots and prevent bleed-through from previous finishes.
Finally, addressing imperfections is paramount for achieving a truly professional result. Small dents, scratches, or gouges can significantly detract from the final appearance. Wood filler, applied with a putty knife, is ideal for repairing imperfections in wooden furniture. Allow the filler to dry completely according to the manufacturer’s instructions, and then sand the area smooth, blending it seamlessly with the surrounding surface. For metal furniture, use an automotive body filler, which is designed to adhere to metal and withstand the rigors of sanding and painting.
Similarly, specialized plastic fillers are available for plastic furniture. Remember, the time invested in meticulous surface preparation will directly translate to the quality and longevity of your finished project. A flawlessly smooth and properly primed surface is the foundation upon which a beautiful and durable finish is built. By taking the time to properly sand, prime, and fill any imperfections, you’ll be setting the stage for a spray painting project that truly shines. This attention to detail is what separates amateur work from a professional-looking finish. Whether you’re using an HVLP spray gun or an airless sprayer, the quality of the surface preparation will significantly impact the final outcome. A smooth, well-prepared surface ensures even paint application, minimizes the risk of imperfections, and contributes to a finish that is both beautiful and durable. Don’t rush this crucial stage – your finished project will thank you for it.
Fine-Tuning Your Technique: Mastering Spray Gun Settings
Mastering your spray gun settings is crucial for achieving a professional furniture finish. It’s like fine-tuning a musical instrument, where pressure, fan pattern, and flow rate harmonize to create a flawless result. These settings directly impact atomization, the process of breaking down paint into tiny droplets, and overspray, the paint that doesn’t land on the intended surface. Finding the right balance minimizes wasted paint and ensures a smooth, even coat. Too much pressure leads to excessive overspray, a rough, textured finish, and wasted material, a concern for the budget-conscious DIYer.
Conversely, too little pressure results in poor atomization, causing runs and drips that mar the furniture’s surface. For furniture refinishing, finding this balance is paramount for achieving a factory-like finish. The fan pattern, controlled by an adjustable knob on the spray gun, dictates the width of the spray. A narrow pattern offers precision for smaller furniture pieces or intricate details, like chair spindles or decorative carvings. A wider fan pattern is more efficient for covering larger, flat surfaces like tabletops or cabinet doors.
Matching the fan pattern to the project ensures even coverage and reduces the risk of uneven buildup. Experimenting with different fan pattern settings on scrap wood, especially when refinishing a valuable piece, allows you to achieve optimal coverage and minimize imperfections. This practice is invaluable for both the novice DIYer and the seasoned furniture refinisher. The flow rate, adjusted on the spray gun, determines how much paint is released. This setting directly influences the thickness of each coat.
A lower flow rate is ideal for thin, even coats, minimizing runs and promoting faster drying times, crucial for multi-layered finishes common in furniture refinishing. A higher flow rate delivers more paint, useful for covering large areas quickly or achieving a thicker, more protective coat, particularly beneficial for outdoor furniture projects. When working with an HVLP (high-volume, low-pressure) spray system, common in DIY projects, adjusting the flow rate is especially important for achieving a smooth, professional finish.
For larger projects, an airless sprayer might be more efficient, but mastering flow rate remains essential for preventing overspray and achieving the desired finish. Begin by consulting the manufacturer’s recommendations for your specific spray gun and paint type. These serve as a valuable starting point, especially for beginners. However, remember that these are just guidelines. Environmental factors like temperature and humidity, as well as the specific type of wood being refinished, can influence the ideal settings.
Always test your settings on a scrap piece of similar material, such as cardboard or plywood, before tackling your furniture project. This practice allows you to fine-tune the pressure, fan pattern, and flow rate, ensuring a perfect match for your project and preventing costly mistakes on your furniture. Consistent trigger control and maintaining a steady distance from the surface, typically 6-8 inches, are crucial for uniform application and preventing blotchy or uneven areas. Achieving a professional-looking finish requires understanding the interplay between these settings.
For instance, increasing the flow rate might necessitate a slight increase in air pressure to maintain proper atomization. Similarly, a wider fan pattern may require you to move the gun more slowly to prevent dry spots. Through practice and experimentation, you’ll develop a feel for how these settings interact and how to adjust them to achieve the perfect finish for any furniture refinishing project. This understanding is key to transforming old or outdated furniture into stunning, personalized pieces.
Beyond the Basics: Advanced Spraying Techniques
Beyond the foundational techniques of spray painting furniture lies a realm of artistic expression waiting to be explored. Advanced spraying techniques empower DIY enthusiasts and furniture refinishers to transform ordinary pieces into extraordinary works of art. Blending, for instance, allows for seamless transitions between colors, creating captivating gradients and ombré effects. Imagine a dresser subtly shifting from a deep teal to a soft aqua, adding a touch of elegance and visual interest. This technique is particularly effective on larger surfaces where the gradual color change can truly shine.
Shading, another advanced technique, introduces depth and dimension, mimicking the play of light and shadow on natural surfaces. By strategically applying darker tones to recessed areas and lighter tones to raised areas, you can create the illusion of contours and curves, adding a touch of realism to your furniture. Faux finishes, such as antiquing and distressing, offer a gateway to replicating the charm of vintage furniture. Antiquing involves applying a dark glaze or stain to crevices and details, then gently wiping away the excess to create an aged, timeworn patina.
This technique works beautifully on ornate pieces with intricate carvings, accentuating their details and adding a sense of history. Distressing, on the other hand, involves intentionally creating imperfections, such as sanding through the top coat to reveal the base color or lightly hammering edges to simulate wear and tear. This technique is perfect for achieving a rustic, farmhouse look. Mastering these techniques requires practice and patience. Experimenting on scrap pieces of wood or cardboard allows you to refine your skills and gain confidence before tackling your final project.
Consider investing in specialized spray painting equipment, such as an HVLP (high-volume, low-pressure) spray gun, for optimal control and a professional-grade finish. HVLP guns minimize overspray, allowing for precise application and reducing paint waste. For larger projects or when working with thicker paints, an airless sprayer might be a more suitable option. Airless sprayers deliver a higher volume of paint quickly and efficiently, making them ideal for covering large surface areas in a shorter amount of time. Whether you’re aiming for a subtle gradient, a dramatic shaded effect, or a vintage-inspired masterpiece, these advanced spraying techniques open up a world of creative possibilities, allowing you to personalize your furniture and transform your home décor.
Troubleshooting and Safety: Ensuring a Flawless Finish
Even with meticulous preparation and technique, spray painting, especially in furniture refinishing, can present challenges. Recognizing and addressing these common issues is crucial for achieving a professional-grade finish. Runs, those dreaded drips and sags, are often the result of applying too much paint in one area or holding the spray gun too close to the surface. Correcting runs involves allowing the paint to fully dry, then carefully sanding down the affected area with fine-grit sandpaper (220-grit or higher) until smooth.
Reapply the paint in thin, even coats, paying close attention to your spray gun settings and technique. Remember, multiple thin coats are always preferable to one thick coat. Orange peel, a textured surface resembling the dimpled skin of an orange, is another frequent frustration. This is typically caused by improper atomization of the paint, often due to low pressure, incorrect nozzle size for the material, or spraying in hot, dry conditions. If using an HVLP spray gun or an airless sprayer, ensure the pressure is within the manufacturer’s recommended range for the specific paint you’re using.
Adding a retarder to the paint can slow down the drying process, allowing the paint to flow and level out more effectively, especially in warmer environments. Experiment with different spray gun settings and nozzle sizes on a test piece before tackling your furniture project. Fisheyes, those small, unwelcome craters that appear in the finish, are almost always caused by surface contamination. Even seemingly clean surfaces can harbor traces of oil, silicone, wax, or other contaminants that repel the paint.
Thorough surface preparation is paramount. Before priming, meticulously clean the furniture with a degreasing agent specifically designed for pre-painting preparation. Follow the manufacturer’s instructions carefully, and ensure the surface is completely dry before proceeding. In some cases, a fisheye eliminator additive can be mixed into the paint, but prevention through thorough cleaning is always the best approach. Sanding after cleaning can also help remove any embedded contaminants. Beyond these common issues, consider the impact of environmental factors.
Humidity can significantly affect the drying time and finish quality of your spray paint project. High humidity can lead to blushing, a milky or cloudy appearance in the finish. If possible, spray paint in a climate-controlled environment with moderate humidity. If that’s not feasible, choose paints formulated for humid conditions or adjust your technique to compensate. Similarly, temperature fluctuations can impact the paint’s viscosity and flow, so maintaining a consistent temperature throughout the spraying and drying process is ideal.
Remember that proper surface preparation, including sanding, priming, and filling imperfections, will also contribute to a smoother, more durable finish. Finally, and most importantly, always prioritize safety. Spray painting releases potentially harmful fumes, so adequate ventilation is non-negotiable. Work in a well-ventilated area, ideally outdoors or in a spray booth equipped with an exhaust system. Always wear a properly fitted respirator with appropriate cartridges to protect yourself from inhaling paint particles and volatile organic compounds (VOCs). Eye protection, such as safety glasses or a face shield, is also essential. Dispose of waste materials, including used paint cans, rags, and filters, according to local regulations. With practice, patience, a commitment to safety precautions, and a solid understanding of spray gun settings, you can achieve professional-grade furniture finishes through spray painting that will impress for years to come, enhancing your DIY and home improvement projects.